
自分用メモ。始めて作成した Flutter アプリを App Store 経由でテストフライト配布したときの手順。
事前注意事項 #
組織名がデフォルトの com.example だと、Apple Developer に Bundle ID を登録するときにエラーとなってしまう。
例
An App ID with Identifier ‘com.example.myFlutterApp’ is not available. Please enter a different string.
お試しでハローワールドアプリを作成・デプロイする場合であっても、com.example 以外の組織名を付与すること。
flutter create my_flutter_app -i swift -a kotlin --org com.my.app
0. 参考資料 #
本記事内では以下の記事をたびたび参照している。本記事に登場する引用文はこれらの記事のもの。
- Build and release an iOS app | Flutter
- 【Flutter】iOS アプリを App Store に公開する手順
- iOS アプリを登録、申請して公開するまで
1. Apple Developer Program に登録する #
以下から Apple Developer Program に登録する。1 年間のメンバーシップ登録で 12,980 円が必要。
- Apple Developer Program - Apple Developer
2. Bundle ID を登録する #
2-1-A. Bundle ID を確認する(Xcode を使った方法) #
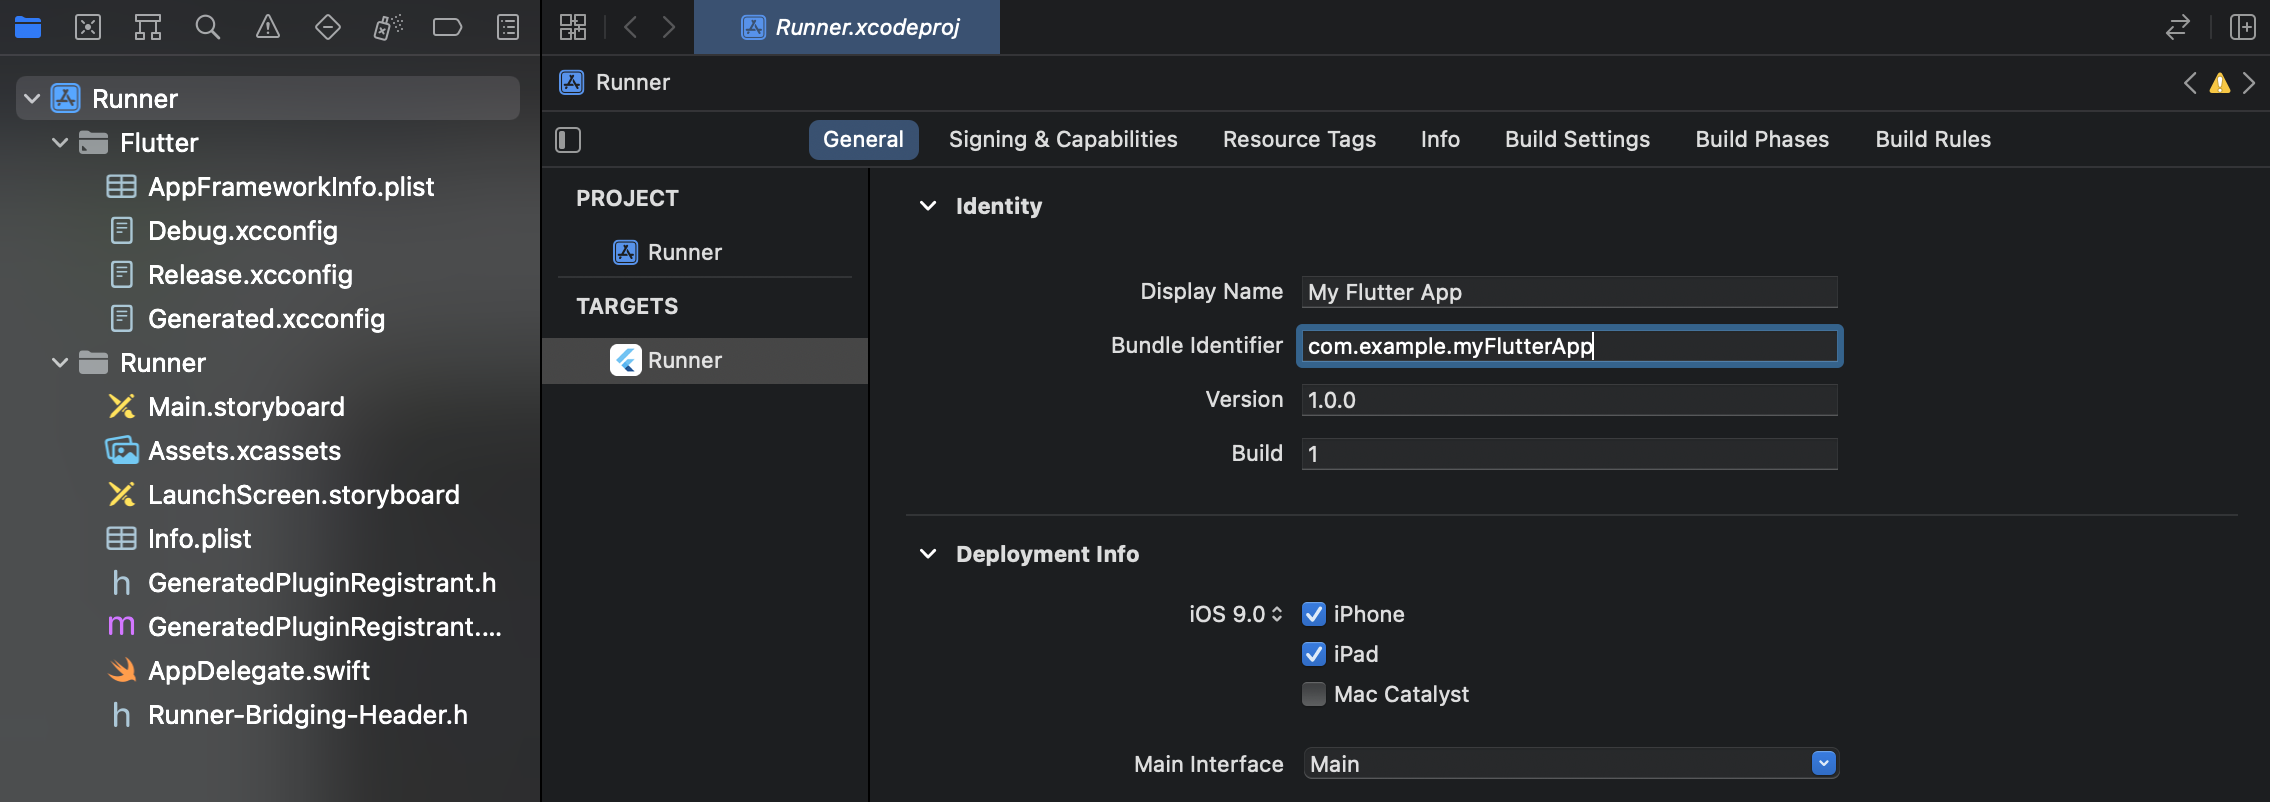
Flutter アプリの ios/Runner.xcodeproj を Xcode で開く。
Runner をクリックし General から Bundle Identifier を確認する。(画像例では com.example.myFlutterApp)
2-1-B. Bundle ID を確認する(Xcode を使わない方法) #
Flutter アプリの ios/Runner.xcodeproj/project.pbxproj を開き PRODUCT_BUNDLE_IDENTIFIER を確認する。
/* 例 */
PRODUCT_BUNDLE_IDENTIFIER = com.example.myFlutterApp;
2-2. Bundle ID を登録する #
以下ページから次のように操作する。
https://developer.apple.com/account/
> Certificates, IDs & Profiles
  > Identifiers
    > + ボタン
      > App IDs を選んで Continue
        > Select a type で App を選んで Continue
- 参考:以下は上記操作後に遷移するページへの直リンク
それぞれの項目を次のように入力する。
- Description: 自分が管理しやすいように自由に説明文を入力
- Bundle ID: Explicit を選択し、先に確認した Bundle ID を入力
その後 Continue > Register で登録する。
3. App Store Connect にアプリを登録する #
公式ドキュメントの通りにやれば良い。
Create an application record on App Store Connect
- Open App Store Connect in your browser.
- On the App Store Connect landing page, click My Apps.
- Click + in the top-left corner of the My Apps page, then select New App.
- Fill in your app details in the form that appears. In the Platforms section, ensure that iOS is checked. Since > Flutter does not currently support tvOS, leave that checkbox unchecked. Click Create.
- Navigate to the application details for your app and select App Information from the sidebar.
- In the General Information section, select the Bundle ID you registered in the preceding step.
For a detailed overview, see Add an app to your account.
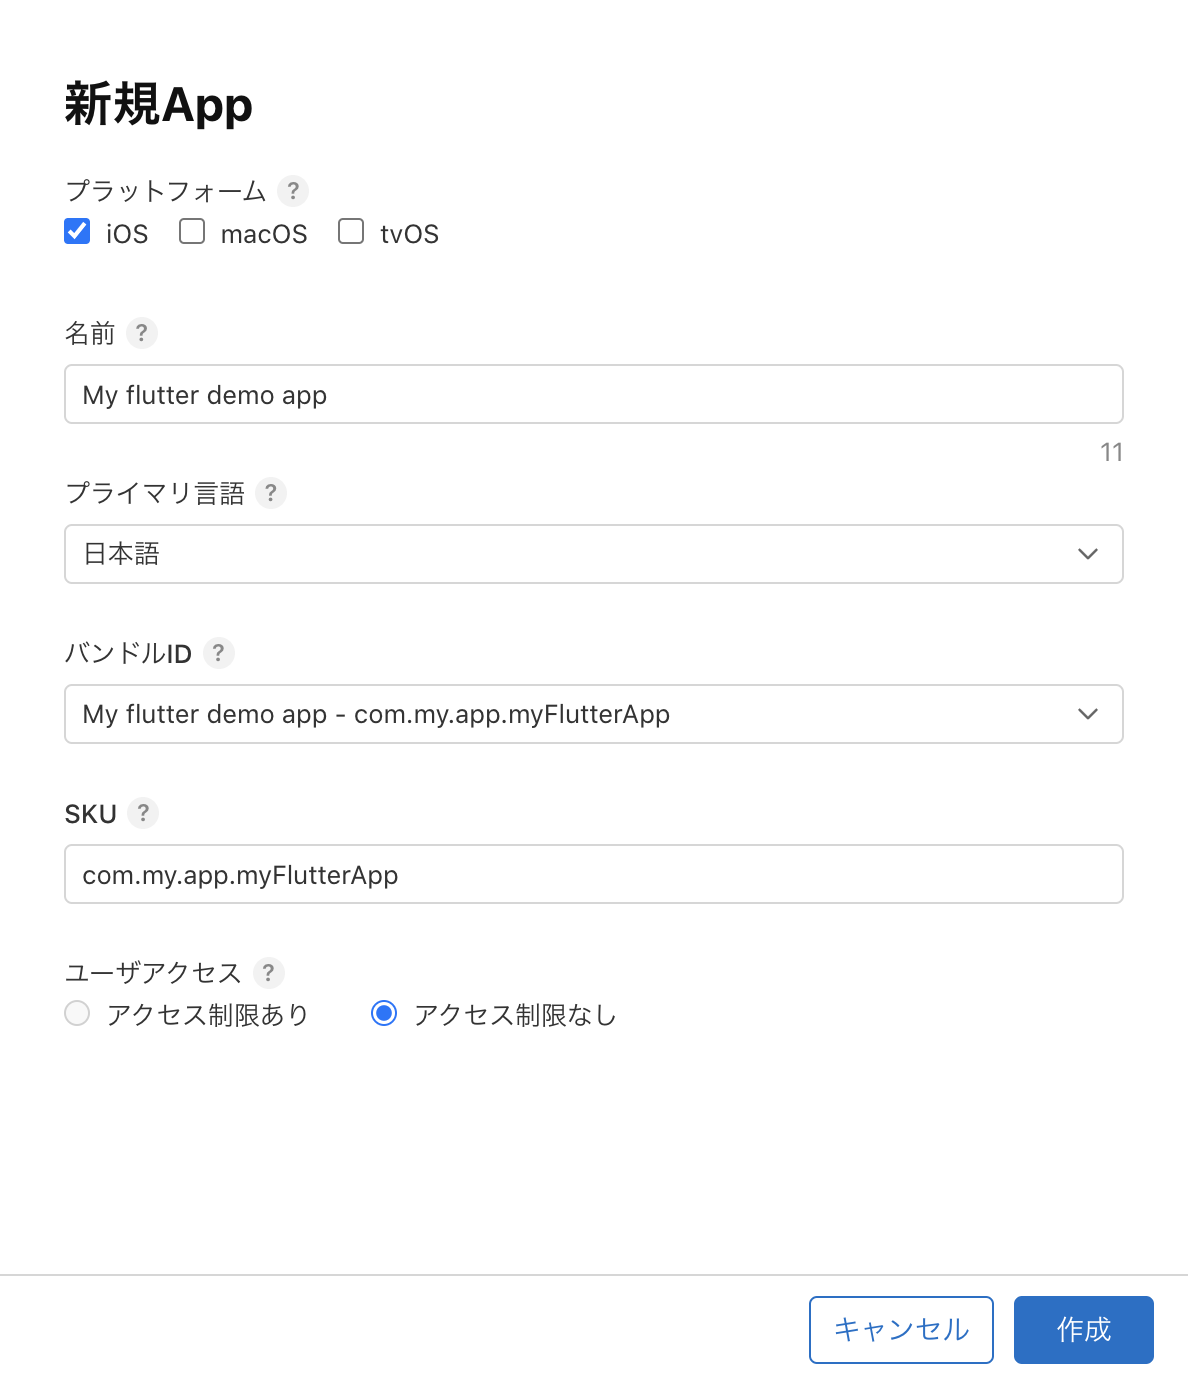
プラットフォームでは iOS をチェックすること。バンドル ID では先ほど登録したものを選択すること。後は自由。
4. Xcode の プロジェクト設定を点検する #
こちらも公式ドキュメントの通りに実施。特に何かをカスタマイズしないのであれば、いまは確認作業だけしておけば良い。
ここで Deployment Target を変更したのであれば以下の注意書きの通り ios/Flutter/AppframeworkInfo.plist も合わせて更新すること。
Updating the app’s deployment version
If you changed
Deployment Targetin your Xcode project, openios/Flutter/AppframeworkInfo.plistin your Flutter app and update theMinimumOSVersionvalue to match.
5. アプリのアイコンを更新する #
省略。必要なら公式ドキュメントの「Add an app icon」に従って実施。
https://docs.flutter.dev/deployment/ios#add-an-app-icon
6. アプリのバージョンを更新する #
省略。必要なら公式ドキュメントの「Update the app’s build and version numbers」に従って実施。
https://docs.flutter.dev/deployment/ios#update-the-apps-build-and-version-numbers
7. アプリをビルドしてみる #
Flutter プロジェクトのディレクトリで以下を実行する。
flutter build ipa
すると以下のエラーが発生する。
% flutter build ipa

Archiving com.example.myFlutterApp...
════════════════════════════════════════════════════════════════════════════════
No valid code signing certificates were found
You can connect to your Apple Developer account by signing in with your Apple ID
in Xcode and create an iOS Development Certificate as well as a Provisioning
Profile for your project by:
  1- Open the Flutter project's Xcode target with
       open ios/Runner.xcworkspace
  2- Select the 'Runner' project in the navigator then the 'Runner' target
     in the project settings
  3- Make sure a 'Development Team' is selected under Signing & Capabilities > Team.
     You may need to:
         - Log in with your Apple ID in Xcode first
         - Ensure you have a valid unique Bundle ID
         - Register your device with your Apple Developer Account
         - Let Xcode automatically provision a profile for your app
  4- Build or run your project again
  5- Trust your newly created Development Certificate on your iOS device
     via Settings > General > Device Management > [your new certificate] > Trust

For more information, please visit:
  https://developer.apple.com/library/content/documentation/IDEs/Conceptual/
  AppDistributionGuide/MaintainingCertificates/MaintainingCertificates.html

Or run on an iOS simulator without code signing
════════════════════════════════════════════════════════════════════════════════
No development certificates available to code sign app for device deployment
エラーとなりビルドできなかったので、以降でこれに対応していく。
8. Team を選択する #
さきほどのエラーメッセージ内で言われた以下を実施する。
  1- Open the Flutter project's Xcode target with
       open ios/Runner.xcworkspace
  2- Select the 'Runner' project in the navigator then the 'Runner' target
     in the project settings
  3- Make sure a 'Development Team' is selected under Signing & Capabilities > Team.
     You may need to:
         - Log in with your Apple ID in Xcode first
         - Ensure you have a valid unique Bundle ID
         - Register your device with your Apple Developer Account
         - Let Xcode automatically provision a profile for your app
Xcode から Team を選択する。
その後 Xcode の同画面上で以下のエラーが出た場合は証明書を作成する必要がある。
- Failed to create provisioning profile.
- No profiles for ‘com.example.myFlutterApp’ were found
以降の手順に従って証明書を発行・登録する。
9. Certificate(証明書)を発行・登録する #
こちらの記事を参考に Certificate を発行・登録する。
- 【Flutter】iOS アプリを App Store に公開する手順 - 3. Certificate(証明書) を作成
- iOS, Certificate 証明書を作ってみる
10. Provisioning Profile を作成する #
こちらの記事を参考に Provisioning Profile を作成する。
- iOS アプリ Provisioning Profile を作ってみる
またはこちらも参考に。
- 【Flutter】iOS アプリを App Store に公開する手順 - 4. Provisioning Profile の作成
iPhone の UDID の確認方法はこちらの記事がわかりやすい。
- Phone/iPad の UDID を確認する一番簡単な方法 – ゆーじの Unity 開発日記
11. 改めてアプリをビルドする #
この記事を参考にアプリをビルドする。
- 【Flutter】iOS アプリを App Store に公開する手順 - ipa ファイルを作成してビルド実行
さきほどはエラーとなったが改めて Flutter プロジェクトのディレクトリで以下を実行する。
flutter build ipa
そうすると次のメッセージが表示され、無事に完了したことが確認できる。
Archiving com.example.myFlutterApp...
Automatically signing iOS for device deployment using specified development team in Xcode
project: ABCDEFG123
Running Xcode build...
 └─Compiling, linking and signing...                        51.2s
Xcode archive done.                                         110.8s
Built ~/build/ios/archive/Runner.xcarchive.
上記コマンドが完了したら、Xcode を開き Product から「Archive」を選択して、ビルドを実行する。
「Archive」がグレーアウト表示になっていて選択できない場合は、対象の端末が実機やエミュレーターになっていることが原因。「Any iOS Device (armv7, arm64)」に設定する。
12. アプリを App Store Connect にアップロードする #
この記事を参考に App Store Connect にアップロードする。
- 【Flutter】iOS アプリを App Store に公開する手順 - アーカイブの検証と App Store Connect にアップロード
または公式ドキュメントの以下も同じ。
- Build and release an iOS app | Flutter - Create an app bundle
3.Or openbuild/ios/archive/MyApp.xcarchivein Xcode.Click the Validate App button. If any issues are reported, address them and produce another build. You can reuse the same build ID until you upload an archive.
After the archive has been successfully validated, click Distribute App.
13. アプリを TestFlight(テストフライト)で配信する #
この記事を参考に TestFlight で配信する。
- 【Flutter】iOS アプリを App Store に公開する手順 - 6. TestFlight に配信してベータテスト
または公式ドキュメントの以下も同じ。
- Build and release an iOS app | Flutter - Release your app on TestFlight
以上 #
おわり