Google I/O 2023 のなかで Flutter の Impeller という新しいレンダリングエンジンの紹介動画を見たときのこと。
その動画では本題に入る前に、そもそも画面描画ってどういう手順を追って実施されているのだっけ、という基本的な内容を説明してくれていて、非常に分かりやすかったのでここに記録しておきます。
Flutter に関する動画ではありますが、これから紹介する部分については Flutter 開発者でなくとも理解でき、役に立つ内容です。
https://www.youtube.com/watch?v=vd5NqS01rlA
動画の 1 分 7 秒から 4 分 12 秒くらいまでを抜粋します。
Flutter’s new rendering engine #
Now for everyone who’s watching who’s not a graphics engineer, you might be wondering, what’s a renderer. Well, a renderer is software that helps you translate your UI code into the pixels that you actually see on the screen.
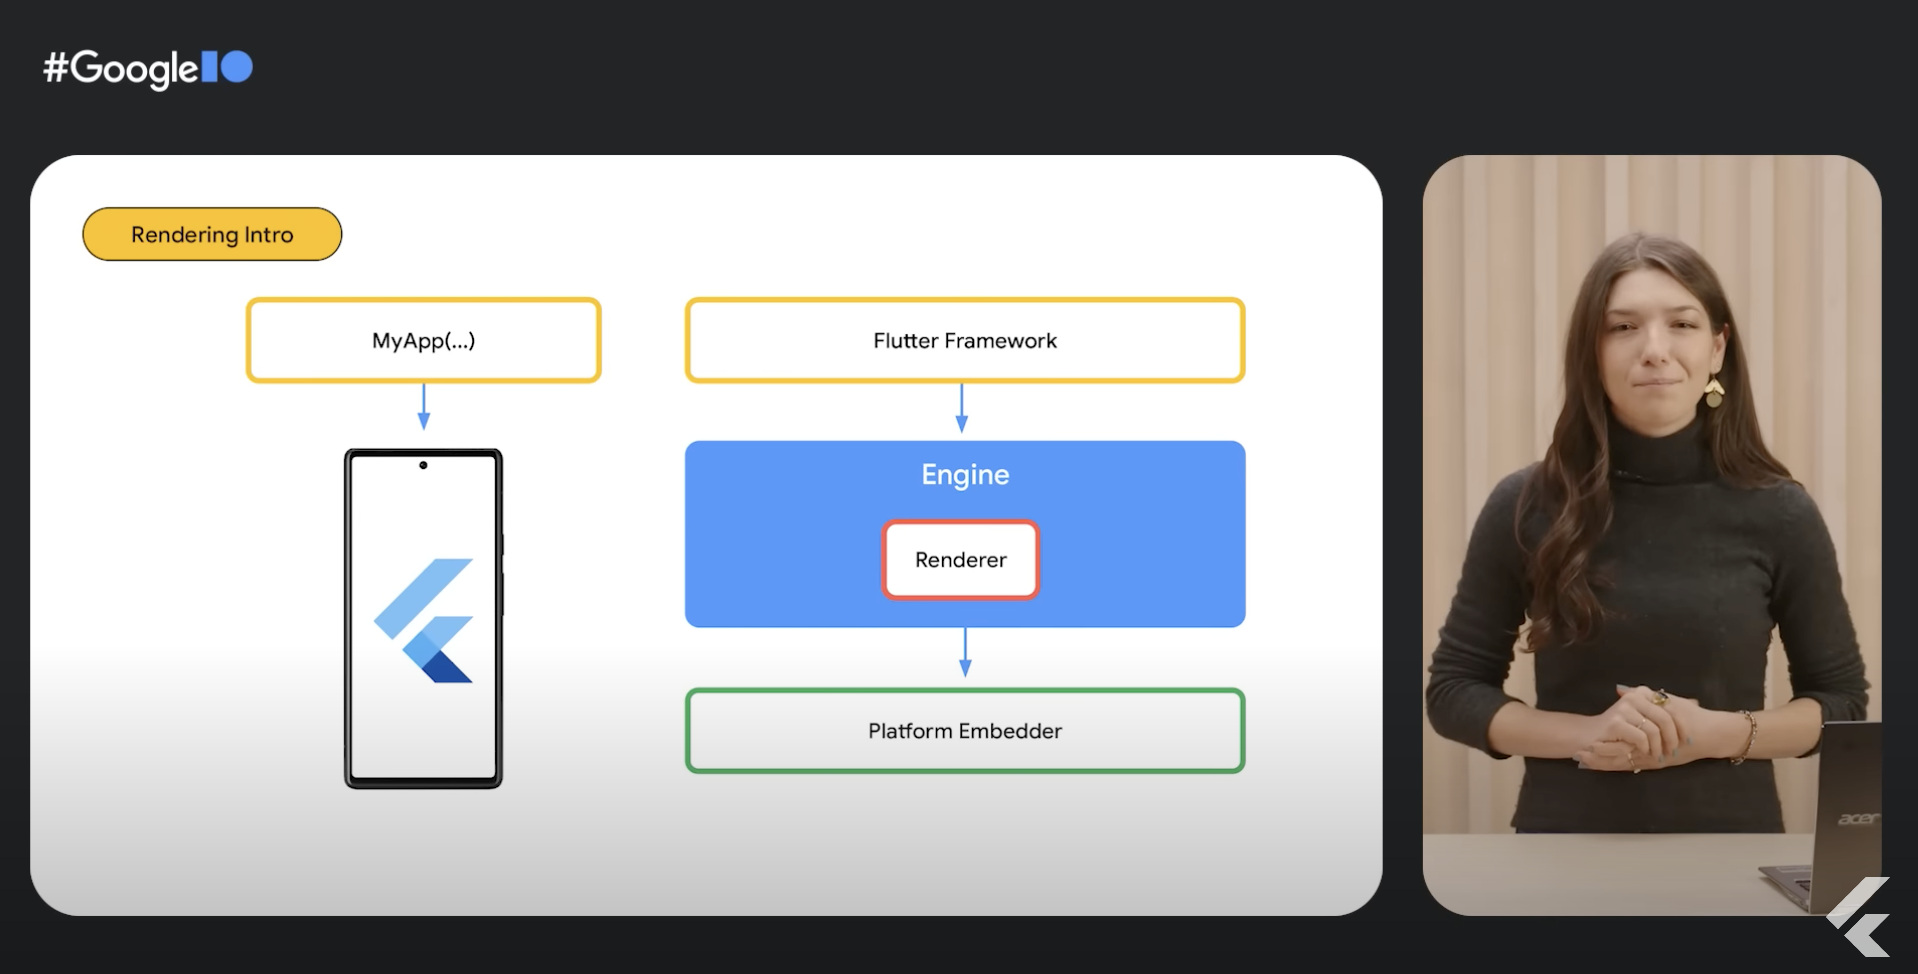
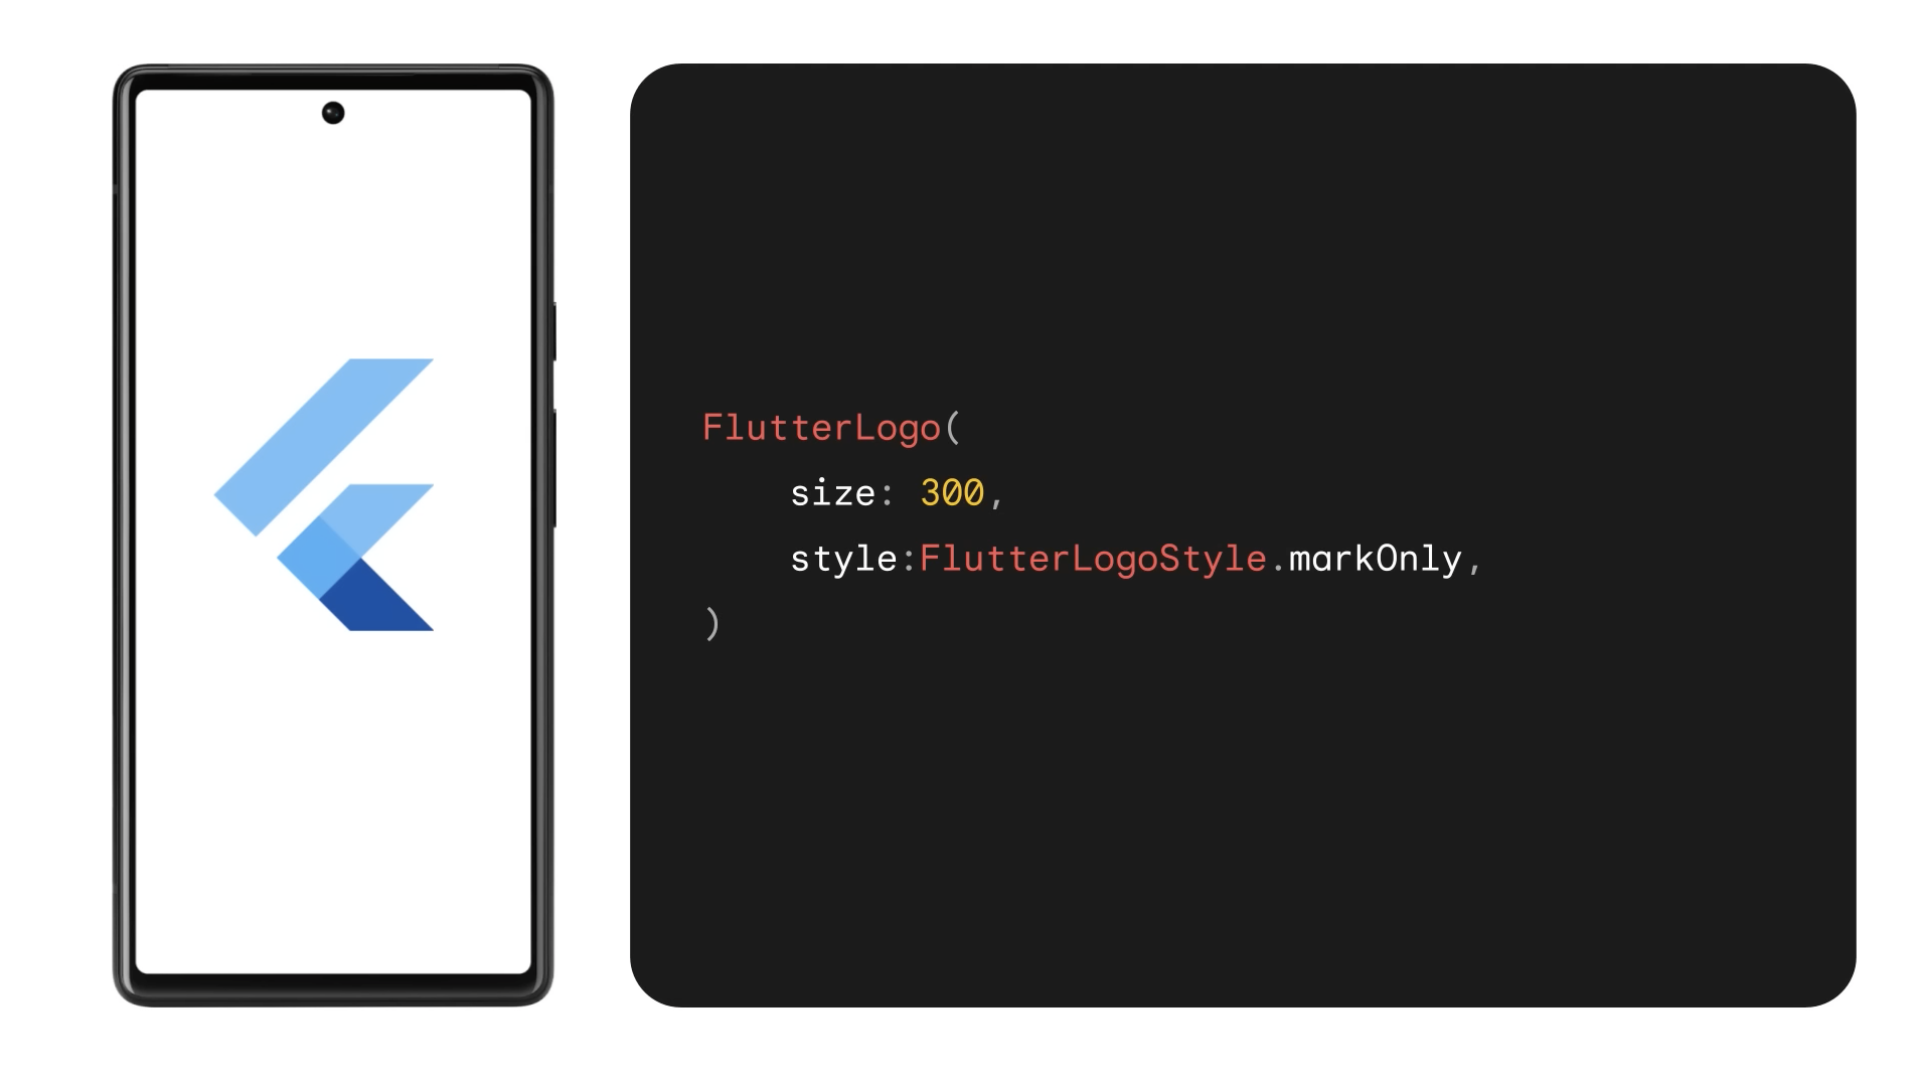
So say you have a simple Flutter app link the one that I’m showing here.
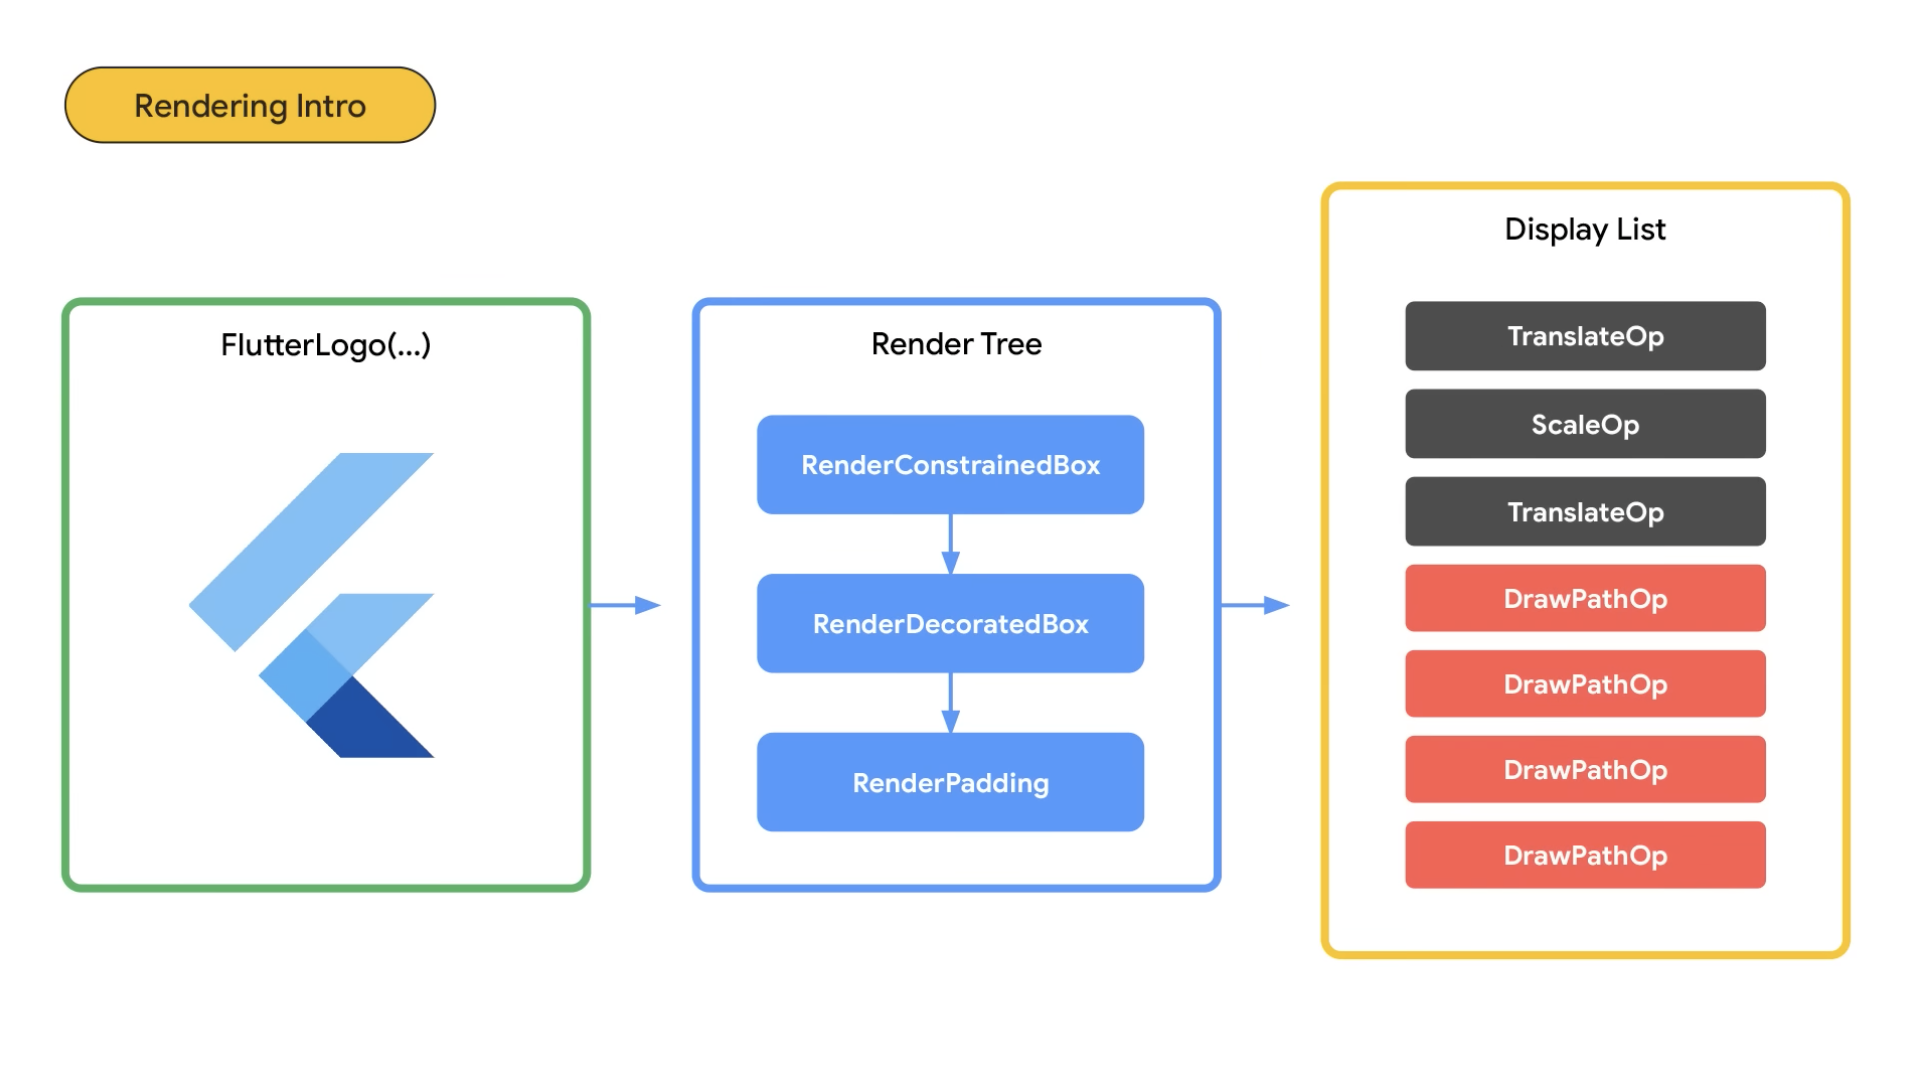
In the Flutter framework, your tree of widgets is backed by a tree of render objects. Render objects contain the instructions for how to actually layout and paint the widgets. These instructions are given to the engine and stored in an ordered list of simple commands called a display list. And now this is where thing get interesting.
The engine is responsible for using one of the available renderers, either Impeller or Skia, to draw this display list to a surface texture, or a grid of pixel values that can be displayed to the screen. It leverages the GPU by setting up a collection of things called render pipelines that can be used to render everything in the display list. So let’s dig into the details.
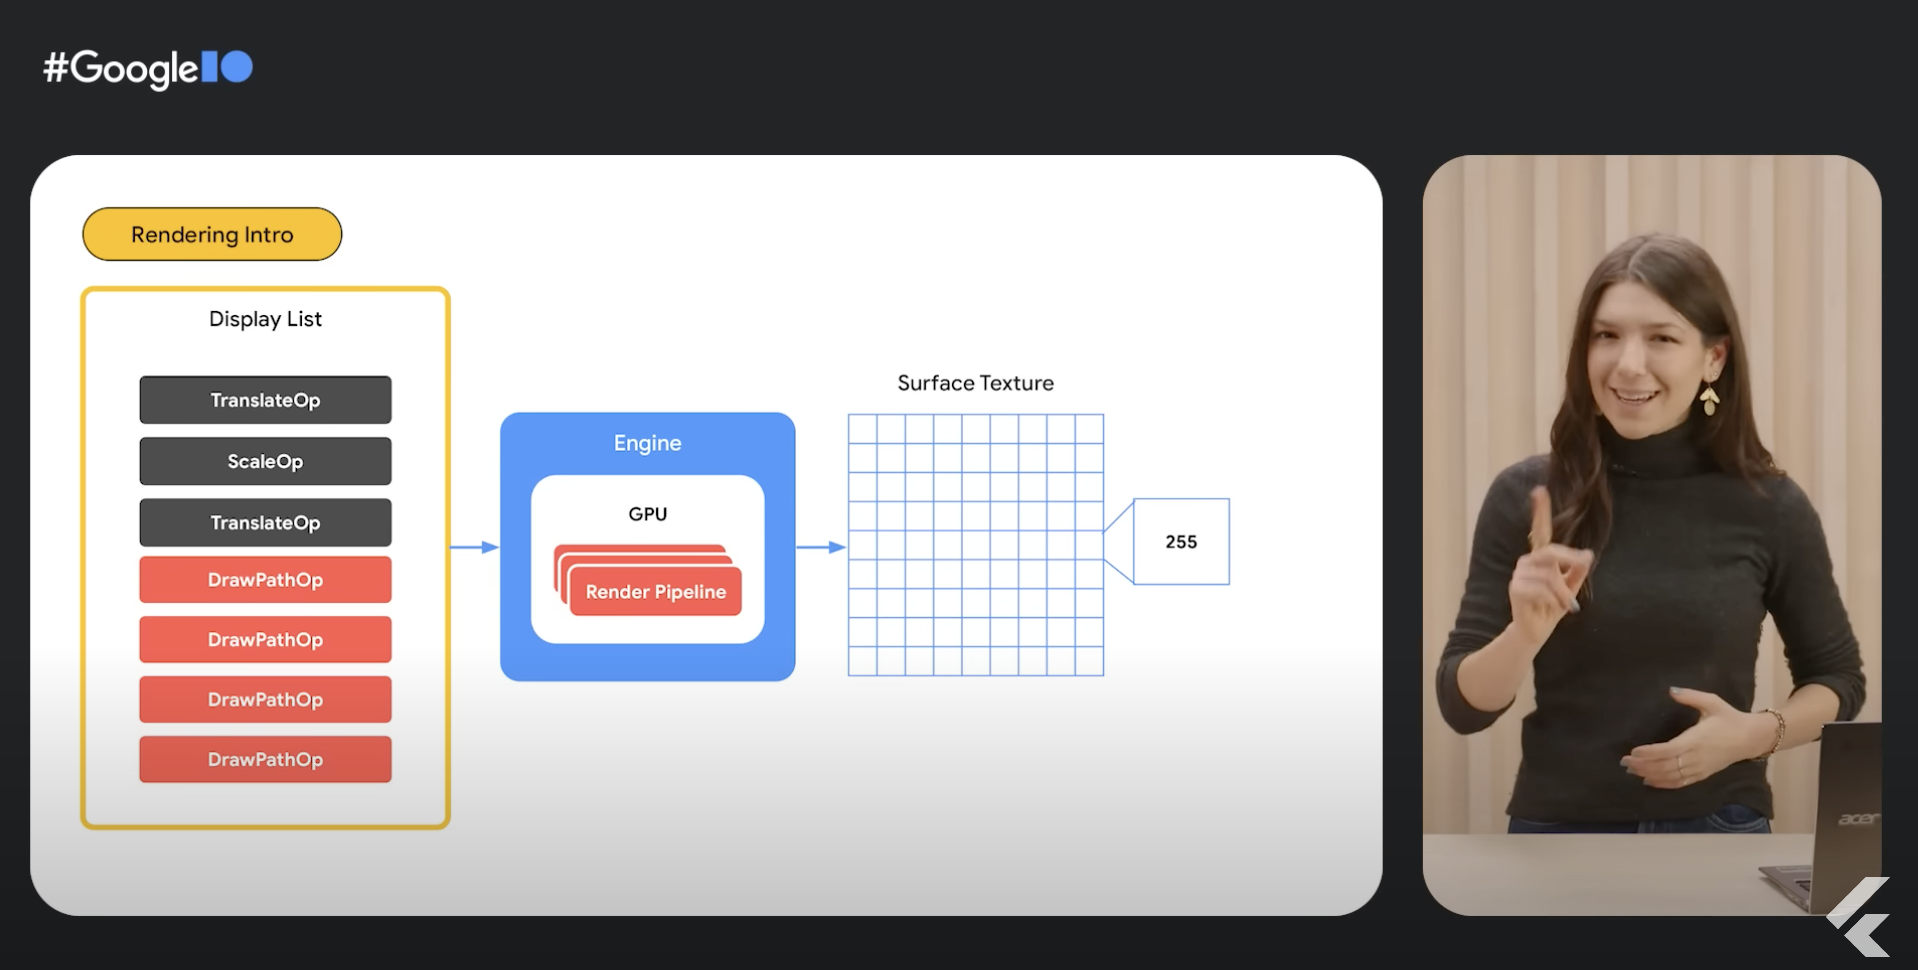
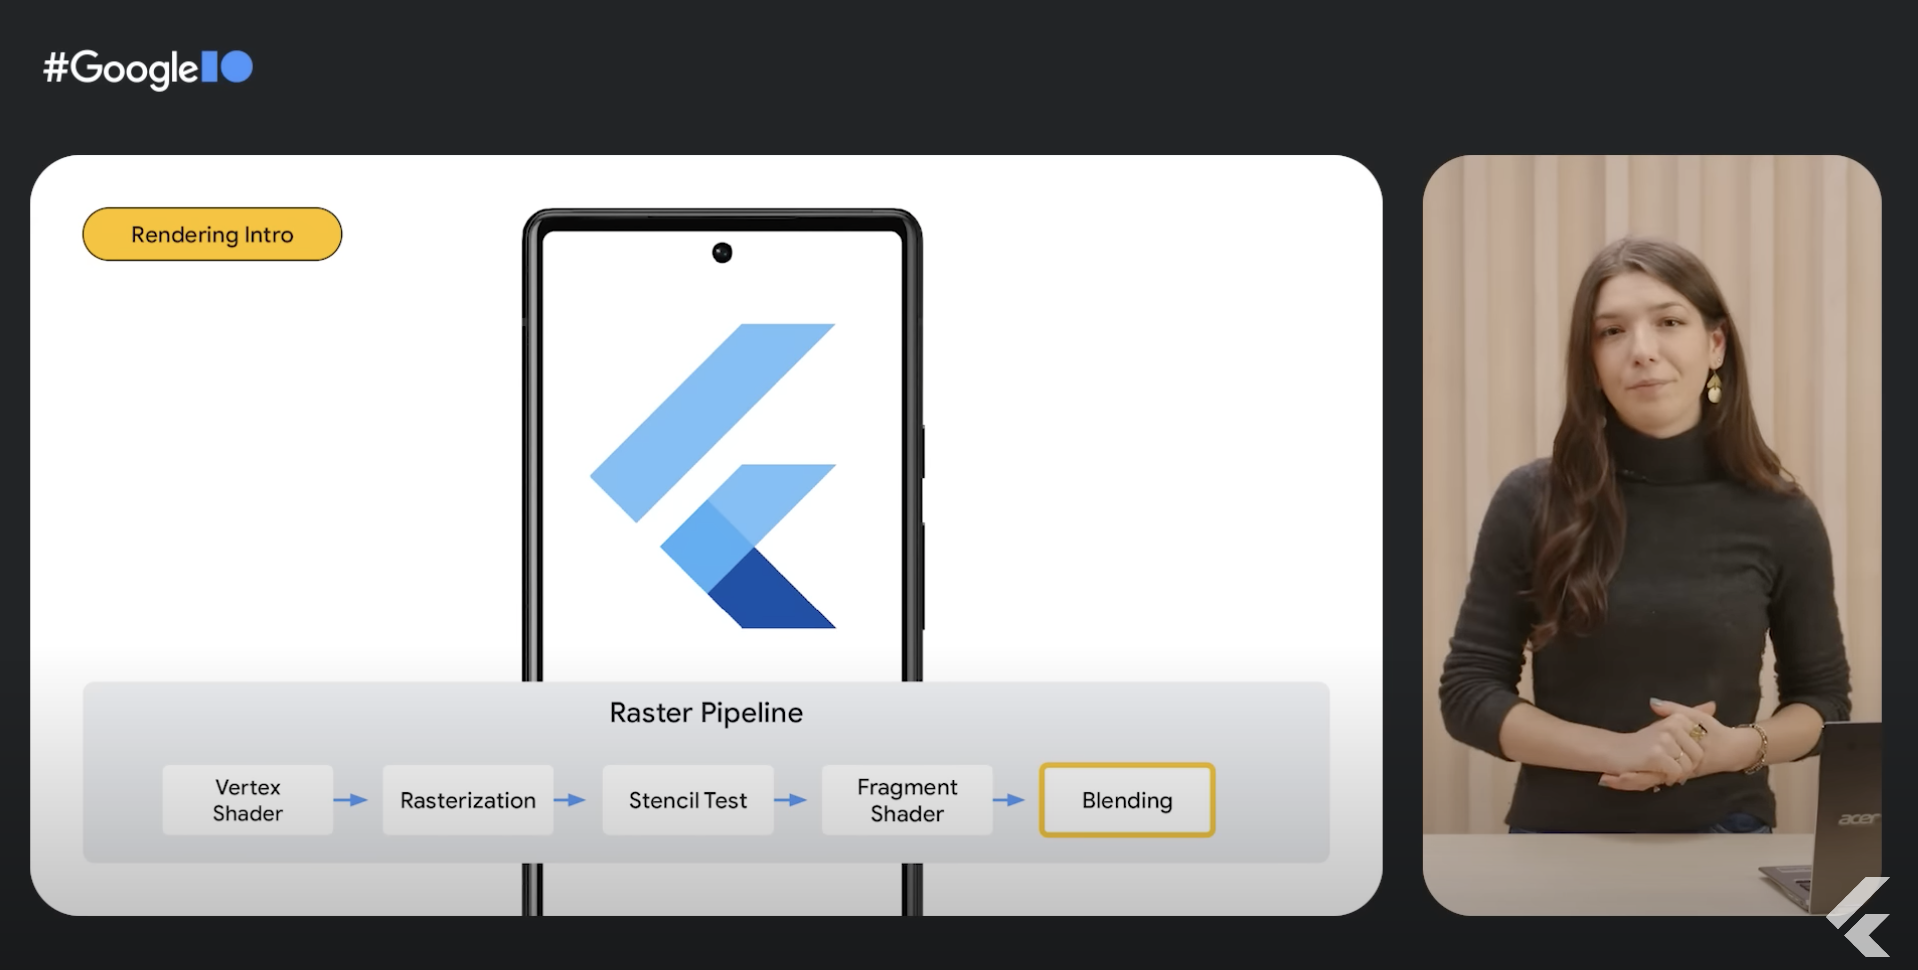
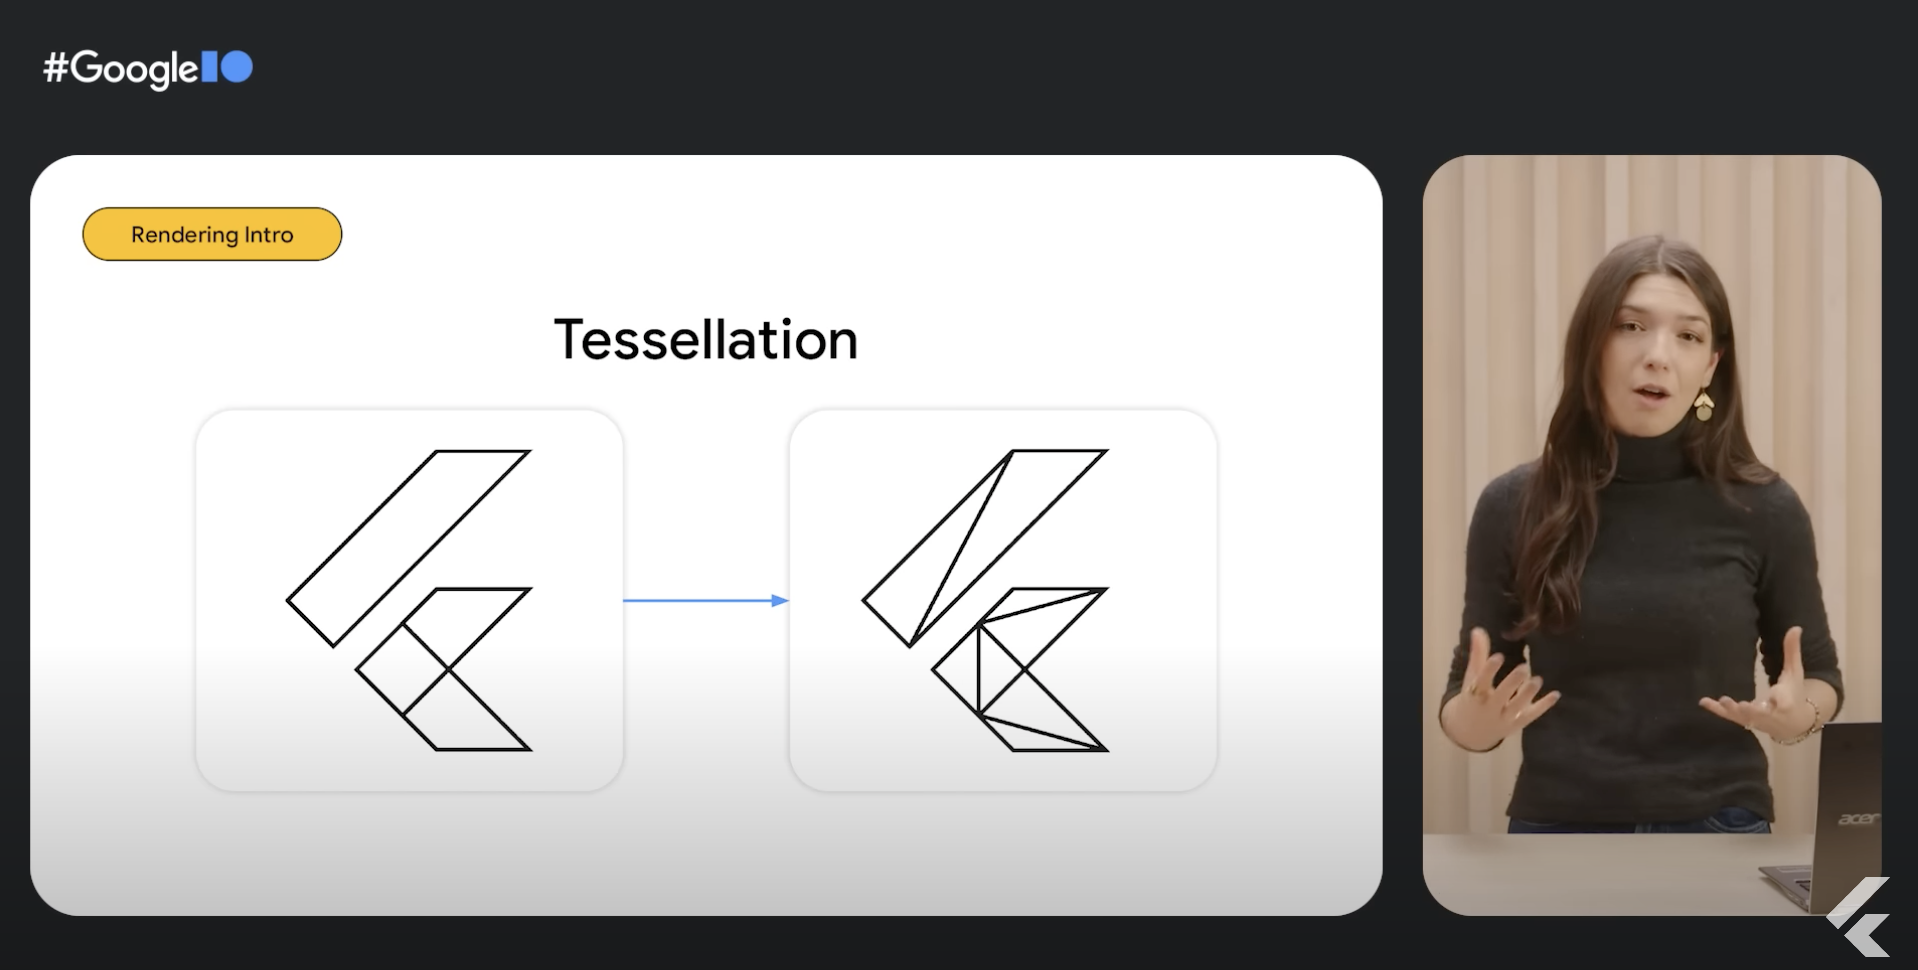
Before we can use a render pipelines, we first need to take all the paths drawn by the display list and tessellate them into set of triangles.
Then each vertex or point on the triangle is passed through something called a vertex shader. Now a shader is just a small piece of code that gets executed on the graphics device. And in this case, the shader are internal, meaning that they’re a part of the Flutter engine’s code base. But us Flutter developers can author our own shaders too, so more on that later.
So the vertex shader takes the vertices that make up the Flutter logo and it moves them to the place on the screen where we actually want to draw them.
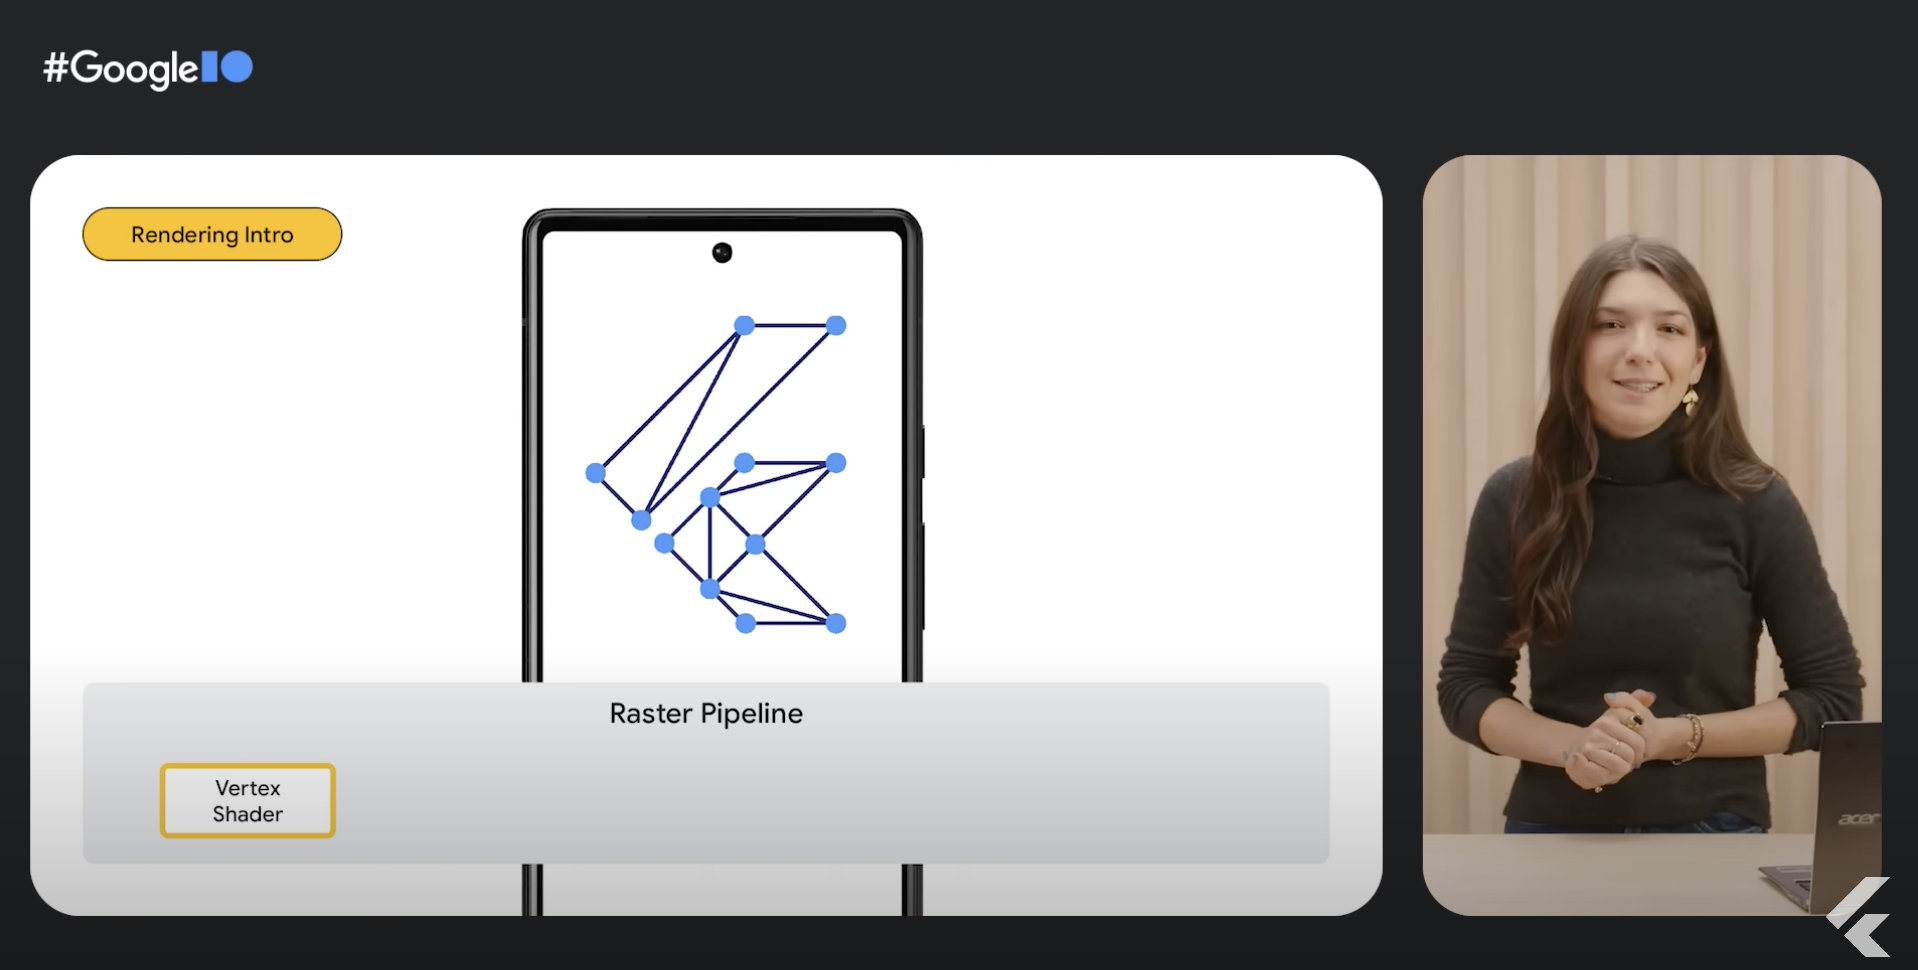
And now the Flutter logo is in the right place and we begin iterating through all the triangles.
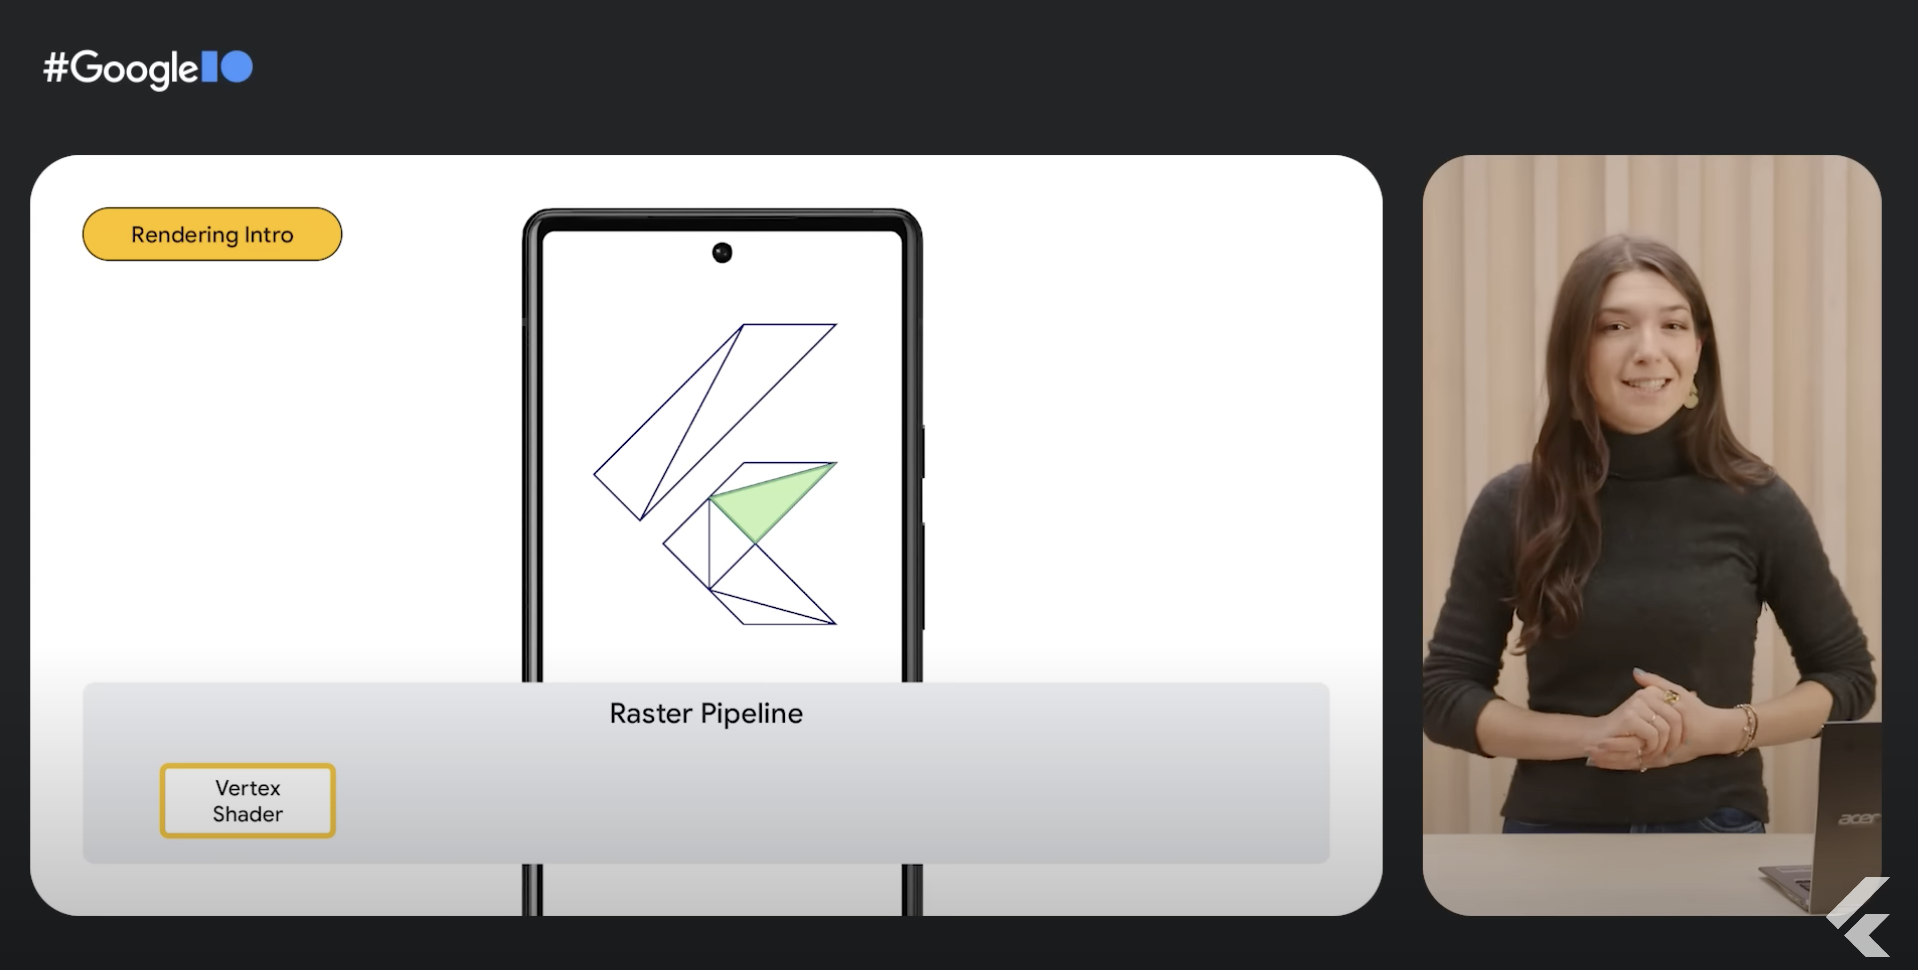
So let’s zoom in a little more. For each triangle, we figure out the specific pixels that are inside it. And this is called rasterization. Then a few checks are run for each of these squares to determine if we actually need to compute a color for it. For Impeller, these checks are really important so we’ll be coming back to this in a bit.
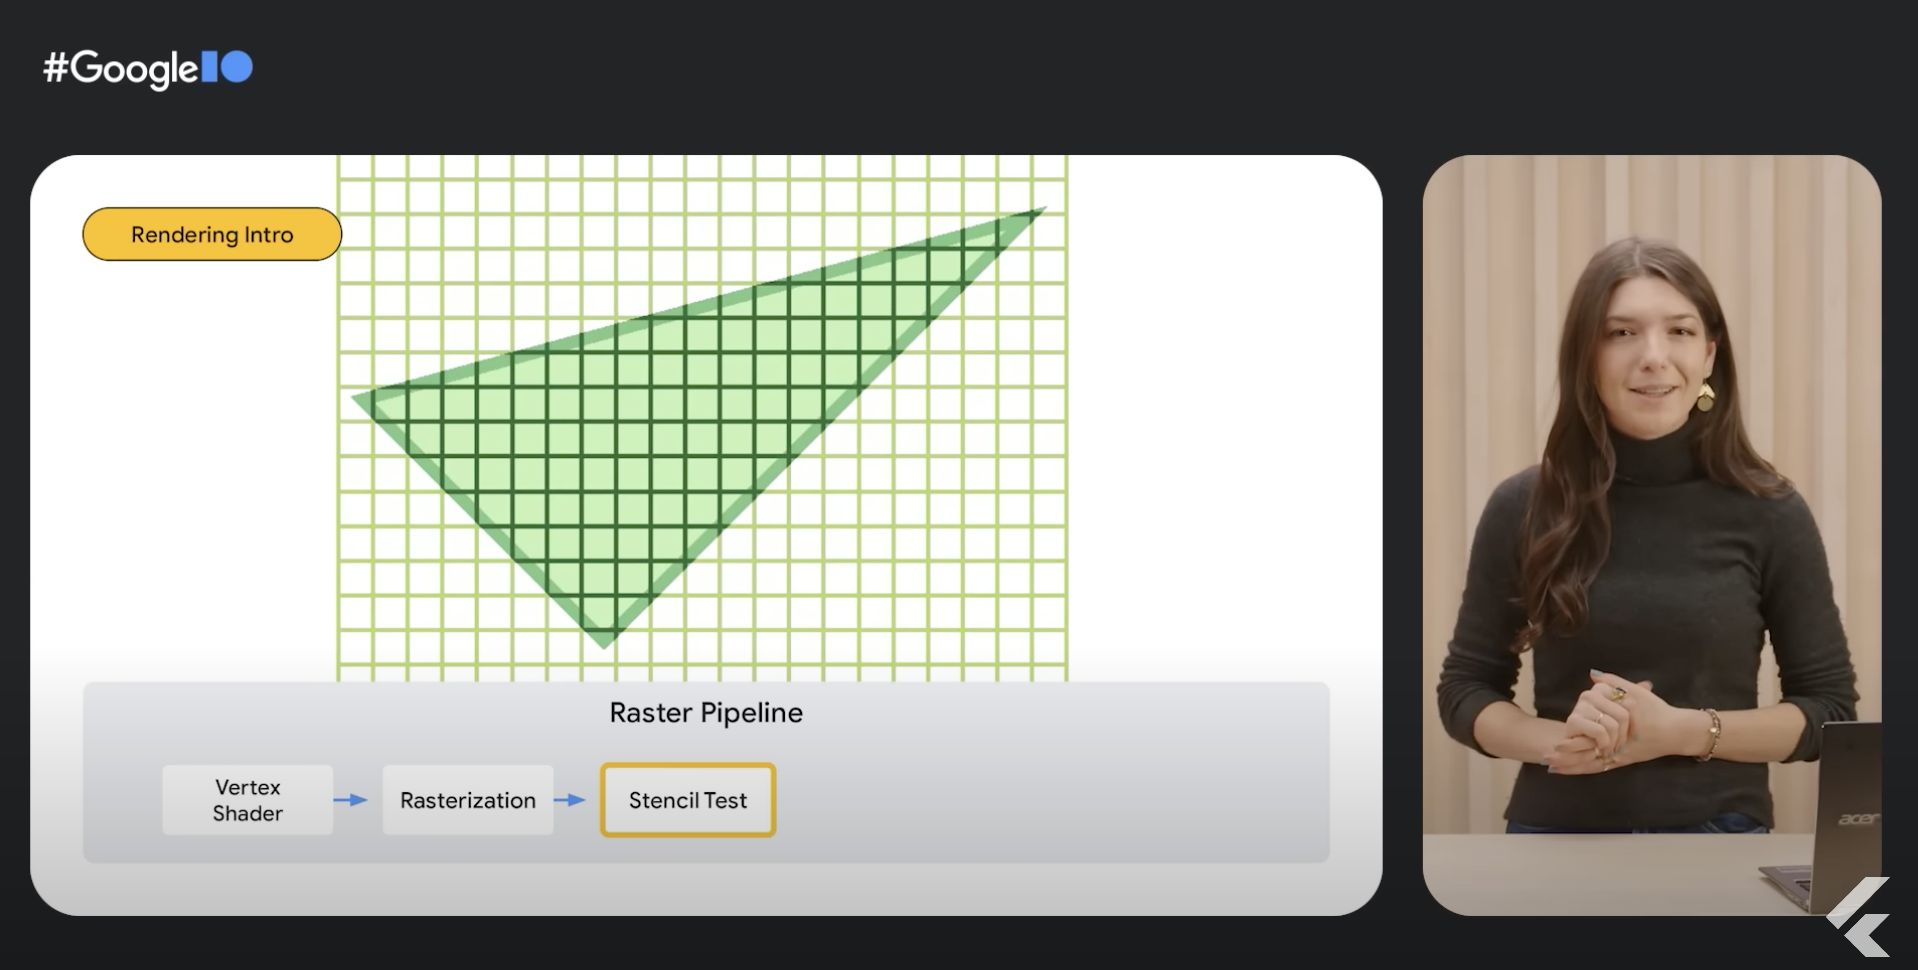
So now all those pixels that are in the triangle are passed through a fragment shader. A fragment shader is another snippet of code, but this time it takes the vertex shader’s output and computes a color.
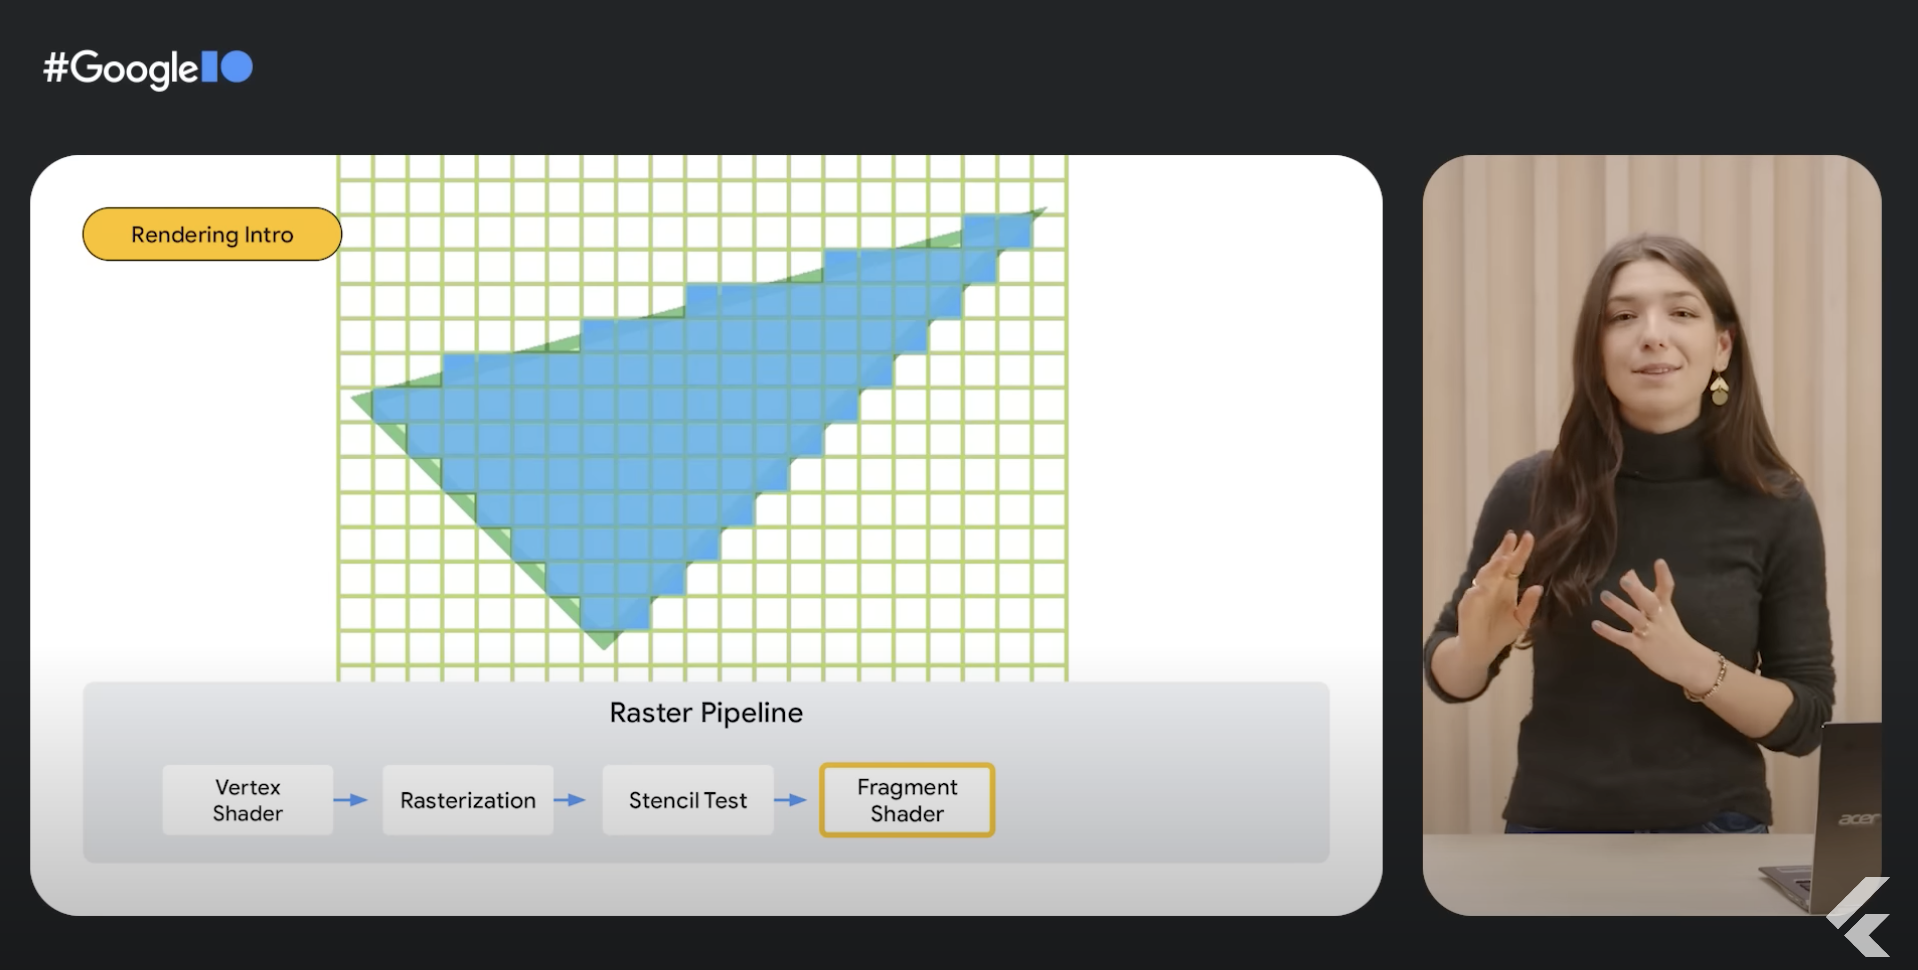
And like I mentioned before, Flutter developers can override this by creating our own shaders to create really neat effects using the fragment program API.
Anyway, back to our render pipeline. Lastly, the output colors are blended with the color that’s already been drawn. In this case, our blending was really simple and we just replaced the color. And that’s how things get rendered on the GPU.
